
The following is a set of basic, fundamental guidelines I’ve assembled for effectively using git within a software development team. At least, I think of them as basic and fundamental. You - fellow nerd - are welcomed to disagree with me, in whole or in part. Take the bits that resonate with you, toss the rest, and share with your peers.
Last updated: March 03, 2017
First, A Metaphor
Before using Git, I tended to think of source control like a big glob of silly putty. Development, in this mental model, was ripping off a chunk from the main wad, molding and adding to it, and then slapping it back on again. Source code was always a big, amorphous hunk of disarray. Like a closet crammed full of too many winter clothes and discarded toys. These days, I tend to think of source control like a book, where commits are pages and pull requests are chapters. git log is an index and closed pull requests are the table of contents. There is a very clear progression from a project’s start to its current state. It’s deliberate and organized. As the book is written, we can reorder or combine pages. We can rip out and throw away a page or a range of pages. Every step in the evolution of a project is documented. As a result, figuring out who did what, why, and when is comparatively effortless.
Judging from frequent conversations I have with colleagues on this subject, I suspect that the ‘Silly Putty Model’ of source control is common, regardless of the source control system(s) used prior to Git. Applying that mode of thought to Git severely restricts your ability to keep a repository clean, organized, and maintainable. In other words, you end up with an overstuffed closet instead of a well-structured book complete with pages, chapters, a table of contents, and an index.
Never push commits directly to any mainline branches
- Instead, create a pull request that describes why your set of changes should be integrated into the mainline branch and merge that into the mainline. Closed PRs are the cliff notes of every repository’s history.
- This also is a good time to get a code review.
- A “mainline” branch always includes the default branch (usually named “master”), but can include others such as “develop”.
- You should generally abide by this guideline even for simple changes. Even seemingly trivial code changes can introduce bugs.
Always create a topic branch for your active development
- Depending on the team’s workflow, you may branch off of master, develop, or some other mainline branch. But regardless of what you branch from, you should work exclusively with your own topic branch.
- A “topic” branch is simply a branch created for a specific development effort: adding a new feature, fixing a bug, etc.
- If more than one person is working on the same feature, create a shared feature branch for everyone and a sub-branch that’s specifically for one person. Communicate often with your fellow developers to avoid complicated merge conflicts. When code is ready to be shared, push it in the shared feature branch; the other developer can then rebase the changes into their “private” branches. When the feature is complete, merge all changes into the shared feature branch and create a pull request from it.
Commit early and commit often!
- Commit more often than feels natural.
- Do not wait until your feature is done to create a commit! Frequent commits enable you to revert to a previous state at any time which can be an absolute lifesaver if you take a wrong turn.
- Small, bite-sized commits make it much easier to navigate the history of a project.
- Create a commit at every juncture over the course of developing a feature.
- Added a new project to a solution? Commit it.
- Wrote the first draft of a new class? Commit it.
- Wrote a new test? Commit it.
- Want to experiment with something? Commit your previous work and go for it! If you decide it’s a dead-end, it’s incredibly easy to revert to your previous state. You can even revert to the previous state without losing your current work by creating another new branch for your experimentation, then reverting the state of the initial topic branch:
git commit -m "Safe point!"<experimental code changes>git checkout -b experimental-branchgit commit -m "I want to save this for later"git checkout -(This goes back to the previous branch)git reset --hard<back to safe coding>
- Done working for the day but not ready to commit your changes? Commit them anyway! Name the commit “WIP: Feature X”. When you’re ready to resume work, you can reset the WIP commit and continue developing without skipping a beat:
git reset HEAD^(Undoes most recent commit, but keeps your changes)
- Give commits short meaningful subjects.
- Try to keep subjects under 50 characters. If you want to write more, use the description field for additional information:
git commit -m "This is a title and should be < 50 characters long" -m "This is the description and can be longer."
OopsandForgot testsare not a terribly meaningful commit messages. However, they can be changed, so if “Oops” means something specific to you while you’re actively developing something, by all means, go for it. Just ensure that you give it a more broadly meaningful subject prior to creating a pull request.- Use the imperative mood in the subject.
- Do not put a period in the subject line.
- Bad commit message examples:
Started creating feature, gtg, doesn't compile.Finally finished new feature because Sheila wanted it.Fix bug found, configuration should've been modified as well, who designed this btw??Added some tests because of code review...
- Good commit message examples:
Add failing test for new featureAdd feature XModify configuration for feature
- But don’t just take my word for it.
- Try to keep subjects under 50 characters. If you want to write more, use the description field for additional information:
Push your changes to the server at least once a day, for two reasons:
- Transparency: It allows other folks to see your progress.
- Backups: If you’re working on something complicated, it would really suck to have to do it a second time. I’ve heard horror stories about people working locally for many days, only to lose all that work when their disk failed.
- Do this even if you have a bunch of messy, needless commits. You can clean them up later with an interactive rebase.
When you’re ready to merge…
- Rebase your branch so that it is synchronized with the appropriate main branch:
- Within your topic branch run
git fetchto get the latest code from the server, then rungit rebase origin/<YOUR_MAINLINE>
- Within your topic branch run
- Squash your commits into bite sized chunks that are individually cohesive.
- Create a pull request and have it reviewed.
- Wait for any build server checks to pass.
- Only then should you merge your code.
After your code is merged…
- Delete your feature branch from the server and from your local machine.
- It’s easy for old, obsolete branches to accumulate on your local machine over time. Click here for a PowerShell script that will delete all local branches except for master. (Use with caution, be sure everything is backed up on the server!)
FAQ
What is “Squashing”?
- In the generic sense, Squashing is the process of combining two or more commits into one. In the specific sense, it refers to a rebase option that combines a commit into its parent and appends its commit message. I used “Squash” in the generic sense in this article.
I’m done with my feature!! What now?
- Make sure you’re “ahead” of your mainline branch. That mean all commits that exist in the mainline branch are also in your topic branch. If no commits have been merged into the mainline branch since you created your topic branch, you have nothing to do. Otherwise, you should run git fetch to update your local repository from the server, followed by git rebase origin/<YOUR_MAINLINE>. You will have to resolve any conflicts that arise.
- The following command will show you how many commits “topic-branch” is ahead and behind of master:
git rev-list --left-right --count origin/master..topic-branch
- The following command will show you how many commits “topic-branch” is ahead and behind of master:
- Next, review your new commits. Are they crafted the way you want and ready to be a permanent part of your project’s history? If not, you should clean up your commits with git rebase. This will allow you to merge multiple commits into one, break individual commits into multiple commits, reword commit messages, and perform other such edits. If you’ve never done this before, this tutorial is a good place to start learning about rebasing.
- Once your commits are perfectly crafted, push your feature branch, create a pull request, and have your code reviewed.
- Now you should be ready to merge your work into the mainline branch.
What’s a “feature branch”? What’s a “topic branch”? What’s a “mainline” branch?
They’re just branches. Nothing special about them at all from a source control point of view. When we talk about “feature branches”, we’re literally just saying “a branch where you’re developing a specific feature”. A “topic” branch is a more generic phrase: it can mean a bug fix branch, a feature branch, or whatever else you can think of. Most branches are short lived: you create it, you do some work, you merge it, and then you delete it. Mainline branches, on the other hand, are long living. The most obvious example of a mainline branch is master, which usually should represent production. Another common example is develop or development which might represent staging. The number of mainline branches in a given repo will vary according to the agreed-upon branching strategy.
How big/small should a commit be?
There’s no concrete answer to this question. Small enough that you can peruse the set of changes in a reasonable amount of time. It’s perhaps better to think of your goal here in terms of cohesion. Highly cohesive commits are more likely to be focused on a narrow task and result in a smaller commit size.
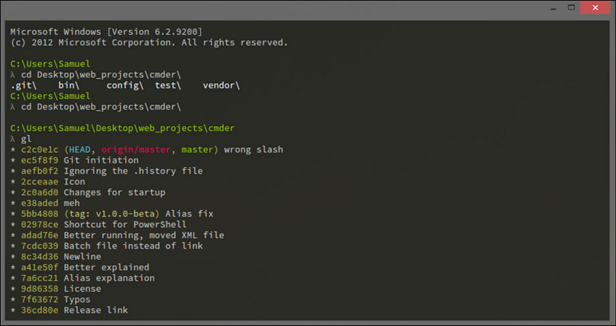
The Windows command prompt and PowerShell CLI are both really ugly; is there another option?
Behold! Cmder - the purdiest darn console Windows users ever did see.
What’s the ONE source of information you’d point to for learning git’s capabilities?
This video. I recommend watching it while sitting at your computer with a “playground” git repo ready to go. That way, you can pause the video and try out the techniques Keith describes.