
Like so many other things, getting your site running over HTTPS is easy… once you know how. If you’ve never done it before, well, it’s not necessarily a straight shot from A to B. Here I describe exactly how to quickly and easily get the S into HTTPS for a site hosted on Webfaction - my preferred web host. Much of this information probably applies to other web hosts as well - but no promises there.
Some Background
If you google “webfaction ssl” or “webfaction https” you’ll find a couple tutorials that are less than helpful for folks who have never done such a thing before. While well intentioned, they gloss over important points which were probably patently obvious to the authors, but weren’t at all apparent to me when I was following through. Truth is, there were a few things I got stuck on which seemed plainly obvious once I figured them out, so it is distinctly possible I too will gloss over important points that are now obvious to me but not to you. If you find yourself lost or confused, please leave me a comment and I’ll try to fill in the blanks. One post that I did find very useful is this one here, which pointed me toward SSLMate. I’ll be forever appreciative of that particular tip.
The steps I describe below include purchasing an SSL certificate via the aforementioned SSLMate. I know what you’re thinking: “But I wanted a FREE certificate!!" I understand. I did too. However, the free route is an utter pain in the ass and is easy to screw up. I tried the free route myself. It took a long time. I screwed it up.1 And I wish I had just used SSLMate from the get-go. SSLMate makes the process soooo easy that I think it’s absolutely worth the measly $16/year per domain. That said, if you reeeeeally don’t want to spend the sixteen bucks, you can go the free/PITA route: Get a totally free SSL certificate from StartSSL and follow the instructions here. The screenshots are a little out of date, but otherwise it’s a great set of step by step instructions.
Step 0: Prerequisites
You need a website hosted on Webfaction that is configured to run over HTTPS. For this site, it was a simple matter of changing a configuration file variable from http://refactorsaurusrex.com/ to https://refactorsaurusrex.com/ (http –> https) and pushing the changes to my server. If you’re using Hugo (or, probably, many other static site generators), that’s all you’ll need to do too. If you’re using WordPress or another CMS, it may not be quiiiiite that simple. Refer to your platform’s documentation for more information.
Step 1: Install SSLMate On The Server
Per the SSLMate documentation, you can install the software locally and upload your certificates to the server, however I wouldn’t recommend doing so. Installing it directly on the server grants you three advantages: 1) It’s always where you need it, 2) You don’t have to copy files back and forth, and 3) You can enable automatic renewals.
Instructions for installing outside software on Webfaction can be found here, with SSLMate-specific instructions here. SSLMate’s installation documentation is here. Everything I write below is the synthesis of those documents, with some helpful tips sprinkled in. Some folks may find the original docs sufficient; if not, read on…
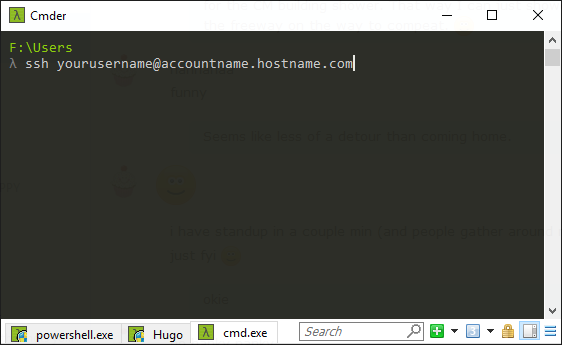
In order to install SSLMate on the server, you must first connect to your account via SSH. For that, I highly recommend using Cmder - the most beautiful console emulator in the whole wide world. Download the most recent version to your local computer and extract the contents to your preferred location. Once you’ve done that, I also recommend following these instructions to add a right-click context menu shortcut that will open a Cmder instance from any Windows Explorer location. Finally, start a new Cmder instance2 and type the following command, using your specific account and login information:
Note: If you’re not using Windows you’ll have to find a SSH tool that works in your environment.
Follow the prompts to enter your password, and you should end up looking at something like this, minus all the pixelation:
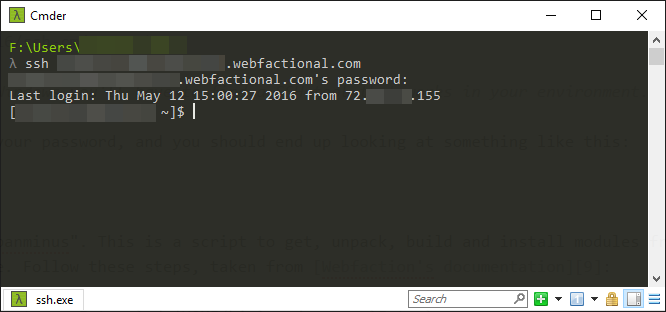
You’re in! Now we can start getting stuff done. First, you need to install “cpanminus”. This is a script to get, unpack, build, and install modules from CPAN. CPAN is a Perl module archive. Follow these steps, taken from Webfaction’s documentation:
- Switch to your
~/bindirectory. Entercd $HOME/binand pressEnter. - Download
cpanm. Enterwget http://xrl.us/cpanmand pressEnter. - Make
cpanmexecutable. Enterchmod +x cpanmand pressEnter.
After you’ve successfully executed those commands, the next step is to download and extract the latest version of SSLMate. Type the following and press Enter:
wget https://packages.sslmate.com/other/sslmate-latest.tar.gz
Then, extract the compressed file. Type the following and press Enter:
tar xzvf sslmate-latest.tar.gz
Now, navigate into the SSLMate directory making sure to enter the correct version number. (As of this writing, it’s version 1.5.1 but that will change.) Type the following and press Enter:
cd sslmate-1.5.1
Then you need to install some dependencies. Type the following and press Enter:
cpanm URI Term::ReadKey JSON::PP
Finally, you can install SSLMate. Type the following and press Enter:
make install PREFIX=$HOME
At this point you may or may not be ready to go. Let’s find out. Type this and hit Enter:
sslmate help
Did you get an error? Yeah, I did too:
Can't locate JSON/PP.pm in @INC
In Perl, @INC is a special array that contains a list of directories from which Perl modules and libraries can be loaded.3 As is indicated a bit further down Webfaction’s Perl documentation page, additional steps are required in order to update this array with the path to the dependencies you just installed for SSLMate. Looking at the docs, you’ll see there is more than one way to skin this cat. I recommend using the following command, which will update your @INC array every time you log in. Be sure to update [YOUR-USERNAME] with, ya know, your username.
echo "export PERL5LIB=$PERL5LIB:/home/[YOUR-USERNAME]/perl5/lib/perl5/" >> $HOME/.bashrc
Alternatively, if for some reason you want to update @INC one session at a time, you can just run the command below. It will not persist after your current SSH session ends:
export PERL5LIB=$PERL5LIB:/home/[YOUR-USERNAME]/perl5/lib/perl5/
Now try running sslmate help again. You should see a list of SSLMate commands. If not, let me know, because clearly I missed documenting an important step somewhere. Otherwise, you are good to go!
Step 2: Buy An SSL Certification
The tedium is over. All you have to do now is type sslmate buy domain.gtld, follow the prompts, and you’re done. It’s amazing. Click here to watch a 60 second demo of how this works. For more information on buy options, read SSLMate’s “Buy A Certificate” documentation.
Step 3: Flip Your Site To HTTPS
Now that you have a certificate, the next thing to do is configure your server instance to run over HTTPS. Log in to my.webfaction.com, go to DOMAINS/WEBSITES –> Websites, and click the site you want to change. Then click the button for Encrypted website (https) and Save.

Be aware: from this point forward, until Webfaction activates your certificate, visitors to your site will be given a rather strong warning indicating that their connection is not private and that they should not view your site. Unfortunately, Webfaction will not activate a certificate unless the site in question is already set to run over HTTPS. (Yes, I tried. My request was denied.) Luckily, Webfaction’s response time is pretty good; they’ll often respond to requests within minutes.
Step 4: Open a Webfaction Support Ticket
Last step! From your Webfaction control panel, go to SUPPORT –> Open a ticket. Tell them “Please activate the SSL certificate I have created for my-awesome-site.com”. Then stare at your inbox for a response. If this guide has been worth its salt, you’ll get a response within a few minutes (but can take up to a few hours) that says, “Your certificate is now active.” You should then see a beautiful, green padlock next to your domain name, just like this:

Isn’t that puuuuuuurdy?
Notes
- Webfaction told me they “installed the certificate, but the intermediate certificate is incorrect.” That’s when I threw in the towel and went with SSLMate instead.
- Either run
cmder.exedirectly, or right click in any Windows Explorer folder and select “Cmder Here”