
Background
By default, my Windows system is set to automatically sleep after 30 minutes of inactivity. That’s usually - but not always - a reasonable amount of time. Sometimes I need it to stay awake much longer. For example, if I come home with 600 photos on my camera and copy them to my computer, I’ll want it to stay awake long enough to get all those images safely copied to my remote backup server. Other times I want it to stay awake while I’m at work, in case in need to connect remotely. Over the years, there’s been a variety of reason why I needed to keep my system awake for longer than normal periods of time and the tool I’ve most often employed to do this is insomnia.
Insomnia is a dead-simple desktop application for Windows. You double click the executable, it runs, and Windows won’t go to sleep until it’s stopped. Aside from preventing sleep, its only other “feature” is the ability to minimize to the system tray. According to the author’s web page, insomnia was first released in 2009 and last updated in 2011. Really, there isn’t much to “maintain” and it’s worked perfectly fine for me all this time. That said, I’ve long since had this nagging desire to spruce it up a bit. In particular, I really wanted the ability to specify a timeout period so it would automatically exit after a certain amount of time and allow Windows to sleep without any manual intervention.
A few weeks ago, I decided to keep my home computer running every weekday while I was at work so I could connect remotely whenever I needed. To do this, I used the Windows Task Scheduler to automatically wake the computer and run insomnia every weekday at 9:30am. When I came home in the evenings, I’d close insomnia so my computer would sleep as normal after 30 minutes of inactivity. Except… I’d often forget, and insomnia would keep my computer running all night long. Finally, I found myself sufficiently motivated to create my own version of insomnia, which I dubbed “NoDoz”. (Named after the caffeine pills, in case you haven’t heard of them.)
NoDoz
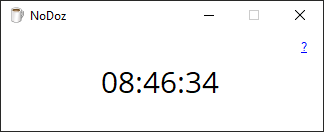
Just like insomnia, you can download NoDoz, double click the executable, and Windows will remain awake indefinitely. Unlike insomnia, it has keyboard shortcuts, command line arguments, and a timeout function.
Getting Started
There are two ways to install NoDoz, as described below. If you’re at all comfortable with command line tools, I highly recommend Option 1. It’s easier, faster, and will automatically add NoDoz to your path so you can run it from your terminal window. But if command line tools aren’t your thing, go directly to Option 2.
Option 1: For Command Line Junkies
- Install Scoop. It’s just another package manager for Windows - like Chocolatey - but so far I like Scoop better.
- Run
scoop checkup. If any warnings are displayed, follow the instructions to correct them. (Scoop has some required dependencies in order to work correctly.) - Run
scoop install https://raw.githubusercontent.com/refactorsaurusrex/NoDoz/master/NoDoz.json - Run
NoDozto start the application. Your system will not sleep until it exits.
Option 2: For You Pointy-Clicky Types
- Click here to see the latest release of NoDoz on GitHub.
- Under the “Assets” section, download the zip file named
NoDoz-v0.0.0.zip, where0.0.0corresponds to the current version number. Ignore the files that say “Source code”. - Expand the zip file you downloaded in step 2 and place the files in a location of your choosing.
- Double click
NoDoz.exeto run the application. Your system will not sleep until it exits.
Using NoDoz
Refer to the NoDoz wiki for more complete documentation.
Command line goodies
nodozby itself will run NoDoz indefinitely. It will not terminate until you exit the application.nodoz -mornodoz --minimizewill start NoDoz minimized to your system tray and run indefinitely.nodoz -m -t 5h15m7sornodoz --mimimize --timeout 5h15m7swill run NoDoz minimized to your system tray and exit automatically after 5 hours 15 minutes and 7 seconds.
Pointy clicky features
- Double click the center of the main window to display an editor to set the timeout duration.
- Left click the system tray icon to unminimize the main window.
- Right click the system tray icon to briefly display the time remaining.
Keyboard shortcuts
Esc: Minimize the application to the system tray.X: Exit the application.H: Open the NoDoz wiki in your browser.E: Edit the current timeout duration.
System Requirements
I’ve only tested NoDoz on Windows 10, but it should work on any system that has .NET 4.6.1 installed. Theoretically, that includes operating systems as far back Windows 7. (Seriously though, why haven’t you upgraded yet?? Windows 10 is so much better!)
Wrapping Up
I now have my Windows Task Scheduler run NoDoz every weekday morning at 9:30am with a timeout of 8 hours. That means my computer is always awake and running when I need it during the day, but is usually fast asleep by the time I get home. And for those times when I need to keep my system running for some arbitrary amount of time, I can simply run NoDoz from my terminal window. Love it!
If you use NoDoz and have any feedback, I’d love to hear it. Post a comment below, open an issue on GitHub, or email me.